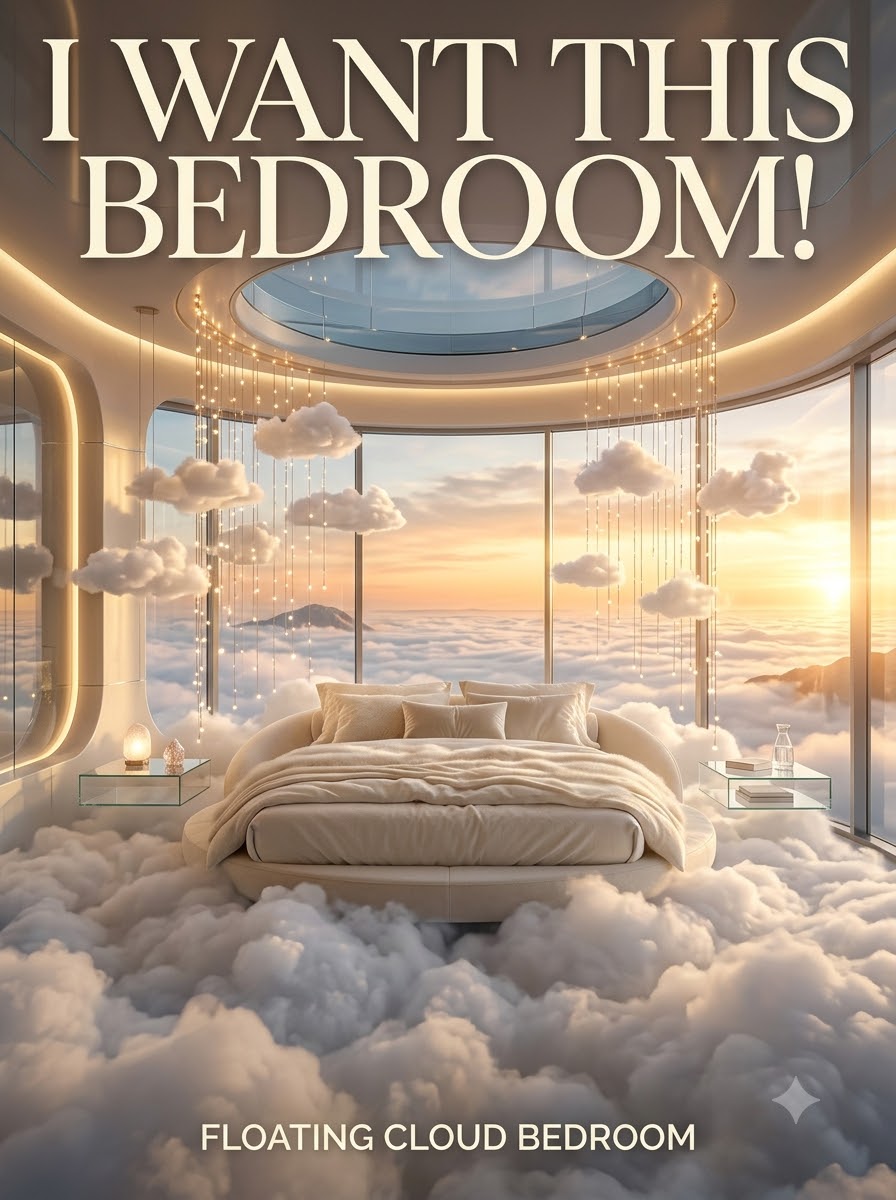

Floating Cloud Bedroom: Complete Step-by-Step Guide to Creating a Magical Cloud Ceiling ☁️✨
Have you ever imagined sleeping beneath a ceiling filled with soft, glowing clouds?
A Floating Cloud Bedroom can turn an ordinary bedroom into a dreamy sky-inspired space. With lightweight cloud formations, hidden LED lighting, soft colors, and carefully arranged furniture, you can create a room that feels as though you’re sleeping above the clouds.
The best part is that the effect can be customized for almost any bedroom—from a small cozy room to a luxurious master bedroom.
What You’ll Create
The finished room will feature:
- ☁️ Floating cloud formations
- 💡 Hidden ambient LED lighting
- ⭐ Optional starry-sky effect
- 🛏️ Cozy cloud-like bedding
- 🎨 Sky-inspired colors
- 🌙 Magical nighttime atmosphere
- 🪞 Soft curved decorative elements
The ceiling becomes the main attraction while the rest of the room supports the dreamy atmosphere.
🧰 Materials You’ll Need
Before starting, prepare everything you need.
Cloud Materials
- Lightweight polyester fiberfill or suitable decorative cloud material
- Lightweight backing/support material where needed
- Strong mounting hardware appropriate for the ceiling
- Small cable ties or suitable fasteners
- Non-damaging adhesive only where appropriate
Lighting
- LED strip lights
- LED controller
- Appropriate power supply
- Extension cable if required
- Cable clips or cable-management accessories
- Optional star-effect LED lights
Bedroom Decoration
- White or pale-blue bedding
- Soft cushions
- Fluffy rug
- Curved or rounded furniture
- Cloud-shaped decorative pieces
- Indoor plants
- Optional wall lighting
Tools
- Measuring tape
- Pencil
- Ladder
- Screwdriver
- Drill appropriate for the ceiling material
- Level
- Cable-management tools
Important: Choose materials specifically suitable for indoor use, and make sure all electrical equipment is rated for the intended application.
Step 1: Plan the Cloud Layout
Before attaching anything to the ceiling, plan the design.
Measure the entire ceiling and decide which areas should contain clouds.
A very effective arrangement is to concentrate the largest cloud formation directly above the bed.
Smaller cloud formations can then spread toward the sides.
Don’t cover the entire ceiling.
Leaving some visible ceiling between cloud formations creates depth and makes the clouds appear separated and floating.
Recommended Layout
Above the bed: Large cloud formation
Near the headboard: Medium clouds
Side areas: Smaller clouds
Corners: Minimal or no clouds
This creates a natural visual flow.
Step 2: Decide Where the Lighting Will Go
Lighting should be planned before the clouds are installed.
The goal is to hide the light source while allowing the glow to spread through the cloud material.
LED strips can be positioned around selected sections rather than randomly throughout the ceiling.
Think of the lighting as a hidden halo.
The light source should illuminate the cloud rather than appear directly in your line of sight.
Best Lighting Colors
Warm white: Cozy luxury bedroom
Cool white: Realistic cloud appearance
Blue: Night-sky effect
Purple: Fantasy atmosphere
Pink: Dreamy sunset effect
RGB: Allows the room to change colors according to mood
Step 3: Prepare the Ceiling
Clean the ceiling before beginning.
Remove dust and check the surface carefully.
Mark the planned cloud areas lightly with a pencil.
This is also the stage where you should identify ceiling structure and safe mounting points.
Do not randomly drill into the ceiling.
The mounting method must be appropriate for the ceiling construction and the weight of the installation.
For a large permanent installation, professional help is strongly recommended.
Step 4: Build the Cloud Shapes
Now comes the fun part.
Start creating irregular cloud formations using lightweight cloud material.
Avoid making every cloud the same shape.
Real clouds have irregular edges, different thicknesses, and uneven surfaces.
Create:
- Thin cloud edges
- Puffy centers
- Smaller wisps
- Large rounded sections
- Uneven contours
The more varied the shapes are, the more natural the finished ceiling will look.
For the main cloud above the bed, create a larger and thicker formation.
For the surrounding areas, use smaller formations.
Step 5: Create Different Cloud Layers
Don’t make the entire ceiling flat.
Create visual depth by using different thicknesses.
Some sections should appear thin and wispy.
Other sections should be fuller and more rounded.
This creates the impression that some clouds are closer while others are farther away.
A layered ceiling looks much more realistic than one continuous sheet of material.
Step 6: Install the Lighting
Once the cloud layout is planned, install the lighting system according to the manufacturer’s instructions.
Place LED strips in locations where the cloud material can diffuse the light.
Avoid placing LEDs where they will be directly visible.
Run the cables neatly along planned routes and secure them appropriately.
Important
Do not allow electrical components to become buried in unsuitable insulating material.
Follow the LED manufacturer’s ventilation, temperature, power, and installation requirements.
If you’re not comfortable working with electrical wiring, have a qualified electrician install the lighting.
Step 7: Attach the Cloud Formations
Now secure the cloud formations to the ceiling using mounting methods suitable for their weight and the ceiling structure.
The clouds should be securely supported.
Do not rely on ordinary tape or weak adhesive for overhead installations.
Check every attachment point individually.
After installation, gently inspect the entire structure to ensure nothing is loose.
The cloud should appear to float visually, but it must be securely mounted physically.
Step 8: Hide the Mounting Hardware
This is what makes the illusion convincing.
Once the clouds are securely attached, conceal visible mounting points using appropriate decorative cloud material.
The goal is to make it difficult to identify exactly how the clouds are supported.
However, don’t conceal anything that needs to remain accessible for inspection or maintenance.
The installation should look magical while still remaining practical and safe.
Step 9: Add the Starry-Sky Effect ⭐
For an extra magical effect, add small star-like lights between selected cloud formations.
Don’t cover the entire ceiling with stars.
Instead, create small clusters.
This gives the impression of distant stars appearing between the clouds.
A few subtle lights can look much more realistic than hundreds of bright points.
Step 10: Transform the Bed
The bed should match the ceiling.
Choose:
- White bedding
- Oversized pillows
- Puffy duvet
- Soft blankets
- Cloud-shaped cushions
- Light pastel colors
Layering different textures makes the bed look softer.
A low-profile or floating-style bed can further strengthen the illusion that the entire sleeping area is suspended in the sky.
Step 11: Add Sky-Inspired Wall Colors
The walls don’t have to be completely white.
Consider:
Soft Blue
Creates a daytime sky appearance.
Deep Navy
Creates a nighttime atmosphere.
Lavender
Creates a fantasy-inspired room.
Pale Gray
Creates a sophisticated modern interpretation.
White
Creates a clean, minimal cloud aesthetic.
For a dramatic effect, use a darker color on the walls while keeping the clouds bright.
Step 12: Add Soft Furniture
Choose furniture with rounded shapes.
A curved chair, rounded bedside tables, soft ottoman, or organic-shaped mirror can complement the cloud ceiling.
Avoid too many sharp geometric shapes.
The entire room should feel soft and flowing.
Keep the floor relatively uncluttered so the ceiling remains the main attraction.
☁️ What the Finished Room Can Look Like


Step 13: Create the Nighttime Atmosphere
Once everything is installed, test the room at night.
Turn off the main ceiling light.
Turn on the cloud lighting.
Start with a soft white setting.
Then experiment with blue, purple, or pink if your lighting system supports color changes.
The room should have enough light to feel comfortable without destroying the illusion of a nighttime sky.
Step 14: Create a Sunrise Effect 🌅
A particularly beautiful idea is to use the lighting to simulate different times of day.
Morning
Warm white + pale yellow
Afternoon
Bright white + soft blue
Sunset
Pink + orange + purple
Night
Deep blue + white
Fantasy Mode
Purple + blue + subtle stars
This allows the same bedroom to have completely different moods.
Step 15: Add a Cloud-Shaped Mirror
A cloud-shaped or organically shaped mirror can become a beautiful accent wall.
Choose a simple irregular silhouette rather than a perfectly rectangular frame.
A soft backlight behind the mirror can create another glowing element.
This helps connect the wall design with the illuminated ceiling.
Step 16: Add a Few Plants 🌿
Add one or two indoor plants to bring natural contrast into the room.
Place them near a window or in an empty corner.
Don’t overdecorate.
The cloud ceiling should remain the primary visual feature.
Step 17: Final Styling
Now add the finishing touches.
Arrange the pillows naturally.
Place a soft rug beside the bed.
Add a small bedside lamp.
Use minimal decorative objects.
Keep cables hidden.
Clean the ceiling and lighting surfaces carefully.
Then turn off the main lights and activate the cloud lighting.
The transformation should be dramatic.
💙 The Ultimate Nighttime Look


💰 How to Make It More Affordable
You don’t need to transform the entire ceiling.
Start with the area directly above the bed.
This creates the strongest visual effect while using fewer materials.
You can then gradually expand the design toward the sides.
Another budget-friendly approach is to use one large cloud formation rather than dozens of small ones.
Focus your money on good lighting and safe mounting.
The lighting often makes a bigger visual difference than adding excessive decorations.
✨ Advanced Floating Cloud Bedroom Ideas
Once the basic design is complete, you can make it even more unique.
🌙 Moon Portal
Add a glowing circular feature among the clouds to represent the moon.
🌧️ Rain Cloud
Create a darker cloud formation with subtle hanging decorative elements to suggest rainfall.
🌈 Rainbow Cloud
Use soft multicolor lighting to create a rainbow atmosphere.
🌌 Galaxy Clouds
Combine deep blue lighting with tiny star points.
🌅 Sunset Clouds
Use pink, orange, purple, and warm white lighting.
🪐 Cosmic Cloud Bedroom
Add subtle planet-inspired decorations to create a dreamy space-themed bedroom.
⚠️ Safety Checklist
Before sleeping underneath the finished installation, inspect everything carefully.
✔ All overhead elements securely mounted
✔ No loose cloud material
✔ No exposed electrical connections
✔ LED power supply installed according to manufacturer instructions
✔ No unsuitable materials covering components that require ventilation
✔ Cables secured and organized
✔ No heavy objects suspended above the bed without appropriate structural support
✔ All materials appropriate for indoor use
For permanent ceiling installations or complicated electrical work, consult qualified professionals.
📸 How to Photograph Your Floating Cloud Bedroom
This bedroom is perfect for photography.
For the most dramatic photograph:
- Turn off the main ceiling light.
- Turn on the cloud lighting.
- Use a wide-angle perspective.
- Photograph from the foot of the bed.
- Keep the room slightly dark.
- Let the glowing clouds become the brightest feature.
- Take another photograph from a low angle to emphasize the ceiling.
A nighttime photograph will usually show the floating effect much more dramatically than a bright daytime photograph.
Final Thoughts
A Floating Cloud Bedroom can completely transform the atmosphere of a room.
The magic comes from combining several simple ideas:
Soft clouds + hidden lighting + cozy bedding + sky-inspired colors + open space.
You don’t need to cover every inch of the room.
A beautifully designed cloud installation above the bed can be enough to create the illusion.
During the day, it can look like a peaceful sky.
At night, with the right lighting, it can become a glowing dreamscape.
And that is what makes the Floating Cloud Bedroom so special—it isn’t just a bedroom makeover.
It’s a little piece of the sky brought indoors. ☁️✨
Frequently Asked Questions
Can I make a floating cloud ceiling myself?
A small decorative installation may be possible as a DIY project if you are comfortable with the materials and mounting system. Large or permanent overhead installations should be professionally assessed and installed.
What material is best for cloud effects?
Lightweight decorative fiber materials are commonly used for cloud-like visual effects. Always select materials appropriate for indoor use and compatible with the lighting system.
Can I use LED lights behind the clouds?
Yes, but the LEDs and power components must be installed according to their manufacturer’s requirements. Avoid trapping components in materials where heat dissipation could be a problem.
How much of the ceiling should I cover?
You don’t need to cover the whole ceiling. Concentrating the largest cloud formation above the bed usually creates the strongest visual impact.
What is the best color for a cloud bedroom?
White and pale blue create a classic sky appearance, while navy, purple, pink, and warm white can create beautiful nighttime and fantasy effects.
Can I change the cloud colors?
If you use compatible color-changing LED lighting, you can create different moods such as sunrise, sunset, moonlight, and fantasy colors.
Is a cloud bedroom suitable for adults?
Absolutely. Using neutral colors, elegant furniture, subtle lighting, and minimal decorations can make the concept look sophisticated and luxurious rather than childish.