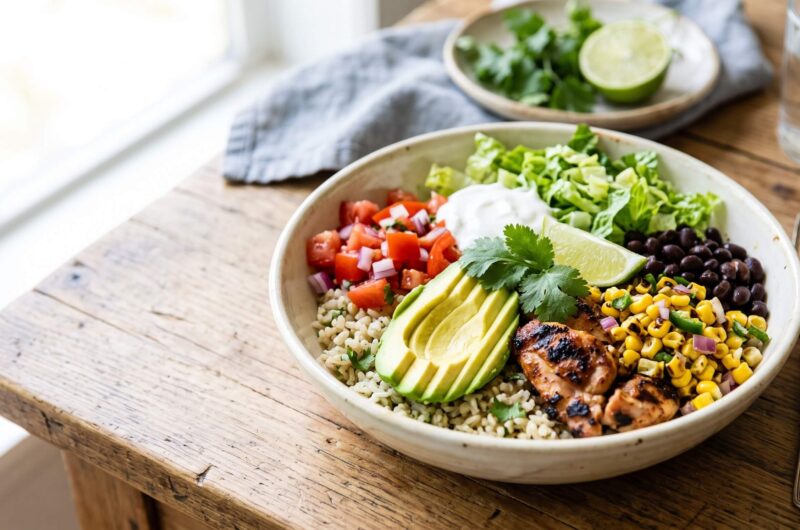

A complete clean-eating meal-prep guide: signature seasoning breakdowns, rice chemistry, roasted corn salsa, black bean technique, macros, and 5-day storage logistics
Why This Bowl Works for Meal Prep
Restaurant-style burrito bowls are meal-prep gold: each component cooks, cools, and reheats independently, and the flavors actually deepen over a few days in the fridge. This guide rebuilds the classic chipotle-marinated protein, cilantro-lime rice, roasted corn salsa, and slow-simmered black beans from scratch, using whole ingredients, controlled sodium, and heart-healthy fats instead of the processed oils and syrups often hiding in fast-casual versions. The result is a bowl that tastes like the drive-thru favorite but fits neatly into a clean-eating routine, with predictable macros for every scoop.
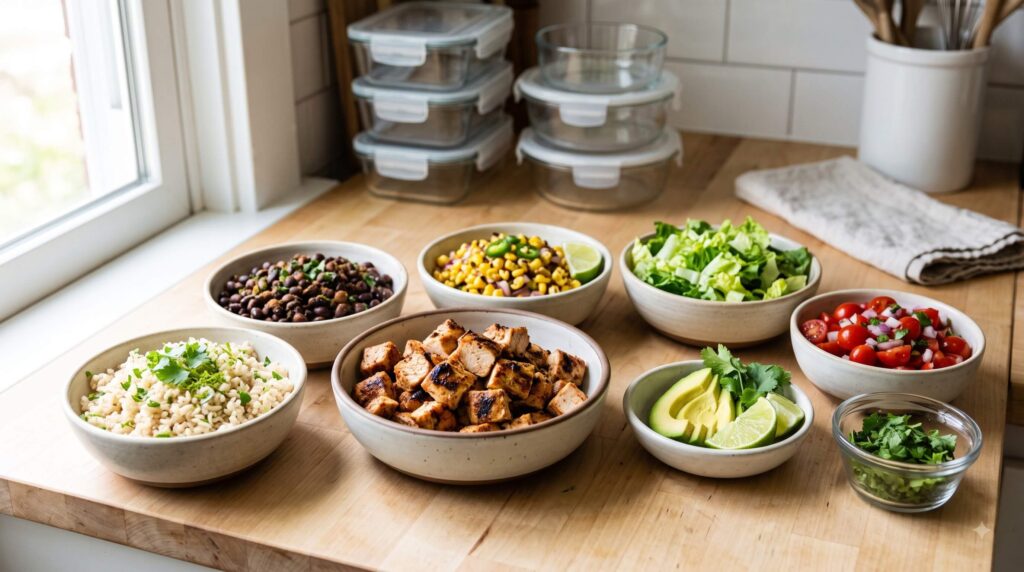
The strategy below is built around batch cooking: you’ll prepare five servings’ worth of each component in one cooking session, then assemble bowls fresh each day (or fully pre-pack them) for a workweek of grab-and-go lunches or dinners.
Ingredient Shopping List (5 Servings)
Protein & Marinade
- 2 lbs boneless, skinless chicken thighs or breasts (or 2 blocks extra-firm tofu for a plant-based version)
- 2 chipotle peppers in adobo sauce, minced, plus 1 tbsp adobo sauce
- 3 tbsp olive oil
- 2 tbsp lime juice (about 1 lime)
- 4 garlic cloves, minced
- 2 tsp ground cumin
- 1 tsp smoked paprika
- 1 tsp dried oregano
- 1/2 tsp ground coriander
- 1/2 tsp black pepper
- 3/4 tsp fine sea salt
Cilantro Lime Brown Rice
- 2 cups long-grain brown rice, rinsed
- 3 1/2 cups low-sodium chicken or vegetable broth
- 1 bay leaf
- 2 tbsp fresh lime juice
- 1 tsp lime zest
- 2 tbsp extra-virgin olive oil
- 1/2 cup finely chopped fresh cilantro
- 1/2 tsp salt
Roasted Corn Salsa
- 3 cups fresh or frozen corn kernels
- 1 red bell pepper, diced
- 1/2 red onion, finely diced
- 1 jalapeño, seeded and minced
- 1/4 cup chopped cilantro
- 2 tbsp lime juice
- 1 tbsp olive oil
- 1/2 tsp chili powder
- Salt to taste
Black Beans
- 2 cups dried black beans (or 4 cans, low-sodium, drained)
- 1/2 white onion, halved
- 3 garlic cloves, smashed
- 1 bay leaf
- 1 tsp ground cumin
- 1/2 tsp dried oregano
- Salt to taste
- 1 tbsp olive oil
Bowl Base & Toppings
- Chopped romaine or mixed greens
- Diced tomatoes or pico de gallo
- Sliced avocado or guacamole
- Shredded reduced-fat cheese (optional)
- Plain Greek yogurt (as a lighter sour cream swap)
Part One: The Chipotle-Cumin Marinade, Deconstructed
The signature smoky, tangy, slightly sweet-heat flavor of restaurant-style chipotle chicken comes from a marinade with four functional layers, and understanding each one lets you recreate it precisely rather than guessing at proportions.
Layer 1 — The acid. Lime juice does two jobs: it begins gently denaturing surface proteins so the meat can absorb flavor faster, and it delivers the bright citrus note that cuts through the smokiness. Keep the marinating time to 30 minutes up to 4 hours for chicken; beyond that, the acid can start to turn the exterior mushy.
Layer 2 — The smoke and heat. Chipotle peppers in adobo are smoke-dried, rehydrated jalapeños packed in a tomato-vinegar sauce. Mincing them finely (rather than just using the sauce) distributes flecks of concentrated capsaicin and smoky compounds throughout the marinade. Two peppers plus a tablespoon of adobo sauce gives a medium heat level with a pronounced smokiness — reduce to one pepper if you want a milder bowl, or add a third for real heat.
Layer 3 — The earthy spice base. Cumin is the backbone flavor of the whole dish; its warm, slightly bitter, slightly citrusy compounds are what most people associate with “Mexican-restaurant seasoning.” Smoked paprika reinforces the chipotle’s smokiness without adding more heat, oregano contributes a slightly peppery, herbal note, and coriander rounds out the citrus-adjacent flavor that echoes the lime.
Layer 4 — Fat as a flavor carrier. Olive oil coats the meat, helps the fat-soluble flavor compounds in paprika and cumin bloom, and prevents the surface from drying out during high-heat cooking. It also promotes better browning (the Maillard reaction) once the chicken hits a hot pan or grill.
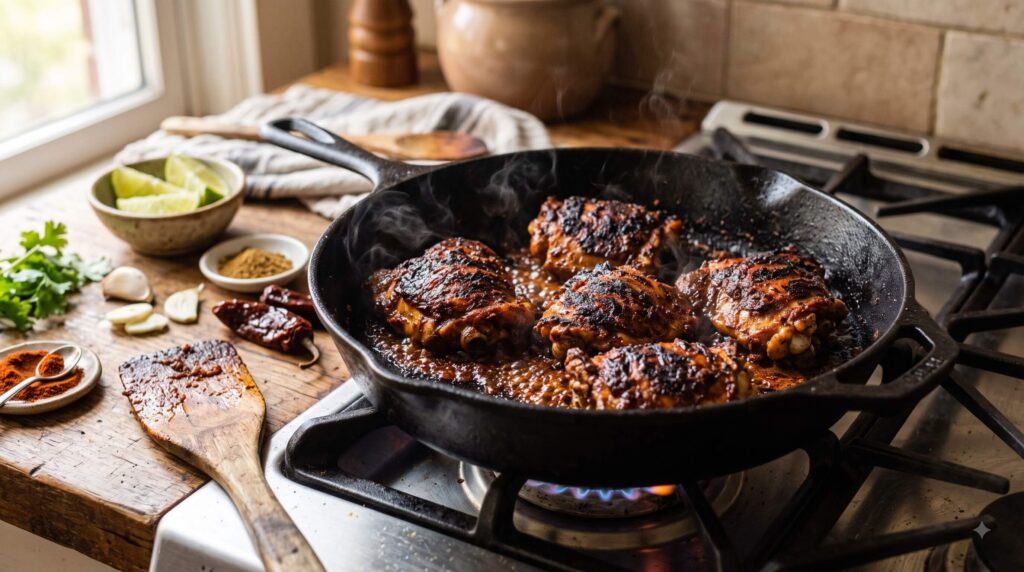
Assembly: Whisk the minced chipotle, adobo sauce, olive oil, lime juice, garlic, cumin, smoked paprika, oregano, coriander, salt, and pepper in a bowl until emulsified. Add the chicken, massage the marinade in, and refrigerate for at least 30 minutes (ideally 2 hours). For tofu, press the block for 20 minutes first to remove excess water so it can actually absorb the marinade rather than diluting it.
Cooking: Sear the marinated chicken in a large cast-iron or stainless skillet over medium-high heat, 5–6 minutes per side for thighs or until internal temperature reaches 165°F. Let it rest 5 minutes before dicing — this keeps the juices in the meat rather than on your cutting board. For tofu, pan-sear cubes over medium-high heat until golden on at least three sides, about 10–12 minutes total.
Part Two: The Chemistry of Perfectly Fluffy Cilantro-Lime Rice
Restaurant rice is notoriously fluffy, separate-grained, and never gummy — and that texture is a function of starch chemistry, not luck.
Why rinsing matters. Raw rice grains are coated in loose surface starch (mostly amylose and amylopectin fragments) left over from milling. If you cook rice without rinsing, that surface starch gelatinizes in the cooking water and glues grains together. Rinsing brown rice under cold water until it runs mostly clear removes this surface starch and is the single biggest lever for grain separation.
Why the water ratio matters. Brown rice retains its bran layer, which is more fibrous and water-resistant than the polished exterior of white rice. That’s why brown rice needs a higher liquid ratio (roughly 1 part rice to 1.75 parts liquid) and a longer cook time (40–45 minutes) than white rice. Too little liquid leaves the interior starch ungelatinized and chalky; too much creates a mushy, waterlogged grain.
Why you should not stir it. Once the rice and liquid come to a boil, agitation ruptures the outer bran layer and releases interior starch into the cooking water, which is the fast track to gumminess. Bring to a boil, then immediately reduce to the lowest simmer, cover tightly, and leave it completely undisturbed.
Why resting matters. After the liquid is absorbed, residual steam continues to gently finish cooking the innermost starch granules. Removing the lid too early releases this steam and can leave a firm, undercooked core. Let the pot sit off-heat, covered, for a full 10 minutes before touching it.
Why you fluff, not stir, at the end. Running a fork gently through the rice separates grains along their natural boundaries without shearing them open, which keeps starch locked inside each grain instead of released onto neighboring ones.
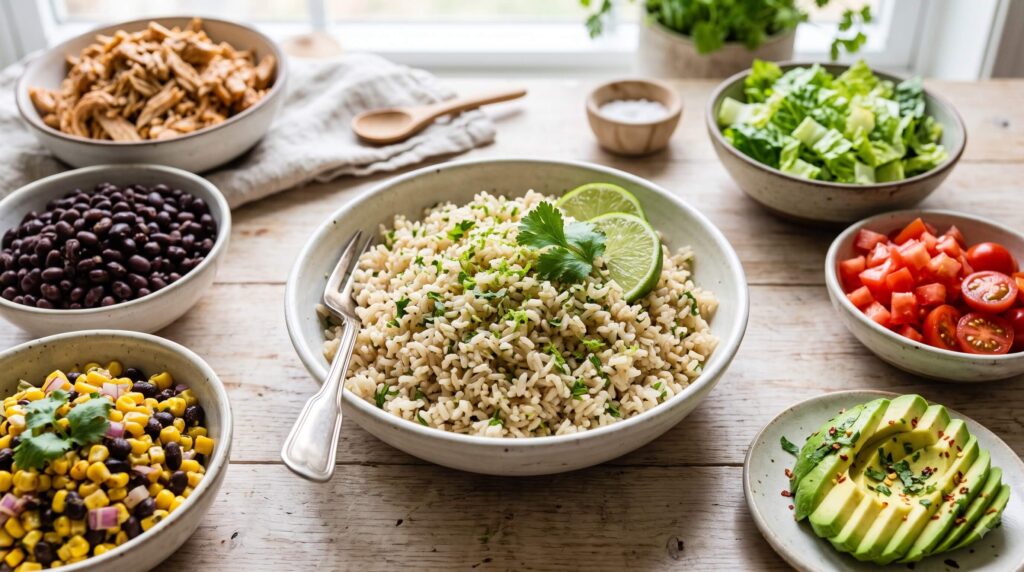
Method: Combine rinsed brown rice, broth, and bay leaf in a heavy-bottomed pot. Bring to a boil, reduce to the lowest simmer, cover, and cook 40–45 minutes without lifting the lid. Remove from heat and rest, covered, for 10 minutes. Discard the bay leaf, then fold in olive oil, lime juice, lime zest, chopped cilantro, and salt with a fork. Fold the cilantro and citrus in only after the rice has cooked and rested — adding acid earlier can interfere with starch gelatinization and leave the rice slightly firmer than intended.
Part Three: Roasted Corn Salsa Assembly
Roasting corn concentrates its natural sugars through caramelization and adds a charred contrast to the bright, acidic elements of the salsa.
Roasting technique: Spread corn kernels in a single layer on a sheet pan (thawed and patted dry if using frozen corn — excess moisture steams instead of chars). Roast at 425°F for 15–18 minutes, stirring once halfway, until kernels show light browning at the edges. Alternatively, dry-sear in a hot cast-iron skillet without oil for 6–8 minutes, shaking occasionally, for a more intense char.
Building the salsa: While the corn cools slightly, combine diced red bell pepper, red onion, and minced jalapeño in a mixing bowl — dicing everything to a similar small size (about 1/4 inch) ensures each bite gets a balance of textures. Add the roasted corn, chopped cilantro, lime juice, olive oil, and chili powder. Toss gently and season with salt to taste. Letting the salsa sit for 10–15 minutes before serving allows the flavors to meld, but avoid making it more than a day ahead of eating fresh if you like maximum crunch — the onion and pepper will soften slightly over the following days in storage.
Part Four: Black Bean Simmering Secrets
Restaurant-style black beans have a deep, almost savory-sweet flavor and a creamy (not mushy) texture, which comes down to low, slow, aromatic simmering.
If using dried beans: Soak 2 cups of dried black beans in water for at least 8 hours or overnight — this rehydrates the beans evenly and shortens cook time significantly. Drain, then combine with fresh water (enough to cover by 2 inches), the halved onion, smashed garlic, and bay leaf. Bring to a boil, then reduce to a bare simmer (small bubbles breaking the surface, not a rolling boil) and cook uncovered for 60–90 minutes, checking for tenderness after an hour. A gentle simmer rather than a hard boil prevents the bean skins from splitting and turning the pot starchy and thick before the interior is fully creamy.
The salt timing rule: Add salt only in the final 15–20 minutes of cooking. Salting dried beans too early can toughen the skins and slow water absorption, extending cook time unnecessarily. Cumin and oregano can go in earlier since their flavor compounds benefit from the longer infusion time.
If using canned beans: Drain and rinse to remove excess sodium, then simmer with a diced portion of the onion, garlic, cumin, oregano, and a splash of water or broth for 15–20 minutes. This is a shortcut, not a true substitute for the depth dried beans develop, but it’s a legitimate time-saver for a busy prep day.
Finishing: Discard the onion halves, garlic pieces, and bay leaf. Stir in a tablespoon of olive oil off the heat — this adds richness and helps the beans glisten the way restaurant versions do.
Assembling the Bowl
Layer each bowl in this order for the best texture contrast: a base of cilantro-lime rice, a portion of black beans, the diced chipotle chicken (or tofu), a scoop of roasted corn salsa, a handful of chopped romaine, diced tomato, and a few slices of avocado. A dollop of plain Greek yogurt in place of sour cream adds tang and protein without the saturated fat load of a traditional dairy-based topping.
Macros Per Bowl (Approximate, Chicken Version)
Based on a standard serving of 3/4 cup rice, 1/2 cup black beans, 5 oz cooked chicken, 1/2 cup corn salsa, and toppings (greens, 1/4 avocado, 2 tbsp Greek yogurt):
- Calories: ~520–560 kcal
- Protein: ~40–44 g
- Carbohydrates: ~48–52 g
- Fiber: ~11–13 g
- Fat: ~18–20 g
- Sodium: ~480–550 mg (significantly lower than most restaurant versions, which often exceed 1,500 mg per bowl)
Swapping in tofu shifts the profile to roughly 460 kcal, 24 g protein, and slightly higher fat from the pan-searing oil; adding shredded cheese adds about 110 kcal and 7 g fat per ounce.
5-Day Meal-Prep Storage Guide
Cooking day logistics: Cook the rice and beans simultaneously on separate burners while the chicken marinates, then sear the chicken last so it stays hottest closest to portioning time. Roast the corn salsa components in the oven while the rice simmers to maximize stove and oven overlap. This sequencing gets a full batch of all four components done in about 75–90 minutes total active and passive time.
Cooling before storage: Let every component cool to room temperature (no more than 2 hours out) before sealing containers. Packing hot food into sealed containers traps steam, which condenses and accelerates spoilage and sogginess — particularly for the rice and salsa.
Storage by component:
- Chicken: Refrigerate in an airtight container up to 4 days; for the full 5-day span, freeze one day’s portion and thaw overnight in the fridge before use.
- Rice: Store in a separate airtight container up to 5 days; the citrus and oil actually help it stay looser and less clumpy than plain rice over time.
- Black beans: Keep in their own container with a little of their cooking liquid to prevent drying out; good for 5 days refrigerated, or freeze in portions for up to 3 months.
- Corn salsa: Best consumed within 3–4 days for optimal crunch; the onion and pepper will continue to soften and release moisture the longer it sits.
- Avocado and greens: Add fresh at the time of eating, not during the batch-prep session — both oxidize and wilt quickly and don’t hold up to multi-day storage.
Reheating: Reheat rice, beans, and chicken together in a microwave-safe bowl for 90 seconds to 2 minutes, stirring halfway, or warm gently in a skillet with a splash of water or broth to prevent drying out. Add the corn salsa, greens, and avocado after reheating so their texture and temperature contrast with the warm base — this mirrors the temperature layering of the original restaurant bowl.
Container strategy: Divided glass meal-prep containers work best, keeping the salsa and greens compartmentalized from the warm components so nothing gets soggy in transit. Label each with the prep date so you can track the rolling 5-day window, especially if you’re staggering cooking across two sessions per week.
With the marinade, rice technique, salsa, and beans all built from clean, whole-food ingredients and portioned with clear macros, this bowl delivers the same craveable flavor as the fast-casual original while giving you full control over sodium, fat quality, and freshness — making it a genuinely sustainable weekly meal-prep staple rather than an occasional treat.