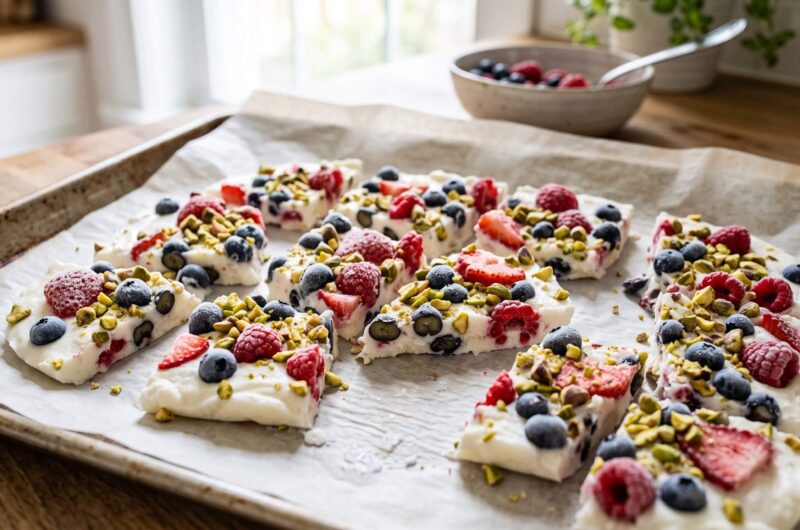

If you’ve been craving something cold, creamy, and a little indulgent without derailing your health goals, this frozen Greek yogurt bark is about to become your go-to treat. It requires exactly three ingredients, takes less than ten minutes of hands-on time, and delivers a satisfying crunch-meets-creamy texture that rivals any specialty ice cream shop dessert — minus the sugar crash.
This isn’t just another “clean eating” recipe that sounds good in theory but falls flat in execution. Below, we’re going deep into the science of what makes this bark work: why your choice of yogurt matters more than you’d think, how different natural sweeteners behave in the freezer, which antioxidant-rich toppings actually complement the flavor and nutrition profile, and how to store your bark so it doesn’t turn into a sad, freezer-burned slab by day three. We’ll also break down the macros and flag the mistakes almost every beginner makes on their first batch.
Why Frozen Yogurt Bark Deserves a Spot in Your Freezer
Frozen yogurt bark has quietly become one of the most popular better-for-you desserts, and it’s easy to see why. Unlike traditional ice cream, which relies on heavy cream and often 20+ grams of added sugar per serving, yogurt bark uses strained Greek yogurt as its base — a genuine protein-and-probiotic powerhouse. Spread it thin, freeze it, and snap it into shards, and you get a dessert that satisfies a sweet-and-crunchy craving while actually contributing to your daily nutrition targets rather than working against them.
The appeal for health-conscious eaters comes down to a few key factors:
- High protein, moderate fat: Greek yogurt is strained to remove much of the whey, concentrating the protein content compared to regular yogurt.
- Naturally lower in sugar: With no added sugar beyond a light drizzle of honey or maple syrup, this dessert avoids the sugar bombs found in most frozen treats.
- Portion control built in: Because you snap the bark into pieces, it’s naturally more mindful than scooping directly from a pint.
- Customizable and adaptable: Once you understand the base technique, you can swap toppings endlessly to match seasonal produce or flavor cravings.
The Three Ingredients
At its core, this recipe needs just:
- Plain Greek yogurt (full-fat or 2% recommended — more on this below)
- A natural liquid sweetener (raw honey or pure maple syrup)
- Fresh or frozen berries and pistachios (technically two components, but they function as one “topping” category)
That’s it. No stabilizers, no gums, no refined sugar. The magic is entirely in technique and ingredient selection, which is why the deep dives below matter so much — this recipe lives or dies on the quality of its few components.
Deep Dive: Choosing Full-Fat vs. Non-Fat Greek Yogurt for Optimal Freezing
This is the single most important decision you’ll make for this recipe, and it’s one that most recipe blogs gloss over entirely.
The Science of Ice Crystallization in Yogurt
When yogurt freezes, the water content within it forms ice crystals. The size and structure of those crystals determine whether your final bark feels smooth and scoopable-soft or hard and icy. Several factors influence crystallization:
- Fat content: Fat molecules physically interrupt the formation of large ice crystals. Full-fat (whole milk) Greek yogurt, which typically contains 4–10% milkfat depending on the brand, freezes into a noticeably creamier, smoother bark. The fat acts almost like a natural “anti-freeze,” keeping crystals small and giving you that satisfying, almost fudge-like snap when you break off a piece.
- Water content: Non-fat and low-fat Greek yogurts have proportionally higher water content relative to solids. More free water means larger, coarser ice crystals form during freezing, which translates to a bark that feels harder, icier, and more brittle — sometimes unpleasantly so, especially straight out of the freezer.
- Protein structure: Straining removes whey and concentrates casein and whey proteins. Higher-protein yogurts (often labeled with 15–20g of protein per serving) tend to hold structure better when thawed slightly, giving you a few extra minutes of “eatable” texture before the bark turns rock-hard again.
Full-Fat vs. Non-Fat: The Verdict
| Factor | Full-Fat (4–10% MF) | Non-Fat (0% MF) |
|---|---|---|
| Texture after freezing | Creamy, smoother, easier to bite | Icier, harder, more brittle |
| Melt-in-mouth quality | Better; fat lowers freezing point slightly | Melts less pleasantly; can feel like ice |
| Satiety | Higher due to fat content | Lower; may leave you wanting more |
| Calories | Moderately higher | Lower |
| Protein per serving | Slightly lower (fat displaces some protein weight) | Slightly higher |
Our recommendation: If texture is your top priority (and for a frozen dessert, it usually should be), reach for full-fat or at minimum 2% Greek yogurt. The small increase in calories is well worth the dramatically improved eating experience. If you’re strictly counting fat grams or have specific dietary needs, non-fat will still work — just know your bark will be firmer and benefit from sitting at room temperature for 3–5 minutes before serving to soften slightly.
One more consideration: always choose plain, unsweetened Greek yogurt regardless of fat content. Flavored varieties often contain added sugars, gums, and stabilizers that can affect both the nutritional profile and how the bark freezes and snaps.
Deep Dive: Raw Honey vs. Pure Maple Syrup as Natural Sweeteners
Since this recipe has no refined sugar, the sweetener you choose does more than add sweetness — it shapes flavor, texture, and even how the bark holds up in the freezer.
Raw Honey
Raw honey is unpasteurized and unfiltered, retaining trace enzymes, pollen, and antioxidants that are otherwise destroyed by heat processing. Flavor-wise, it brings floral, sometimes slightly tangy notes depending on the source (wildflower, clover, and manuka honeys all taste distinct). Because honey is roughly 80% sugar with the remainder being water and trace compounds, it’s slightly sweeter by volume than maple syrup, so you can often use a touch less.
Texture-wise, honey’s higher fructose content means it resists crystallizing and stays slightly more pliable at freezer temperatures. This can translate to a bark that’s a touch less “hard-snap” and more subtly chewable at the edges.
A note on raw honey: because it’s unpasteurized, raw honey should never be given to infants under 12 months due to botulism risk. This is worth mentioning if you’re making this recipe for a household with young children.
Pure Maple Syrup
Pure maple syrup (make sure it says “100% pure,” not “pancake syrup,” which is often just corn syrup with maple flavoring) offers a deeper, more caramel-like flavor profile with earthy undertones. It contains manganese and zinc in modest amounts, along with polyphenol antioxidants from the maple sap concentration process.
Maple syrup is slightly less sweet by volume than honey, so recipes often call for a bit more to achieve the same perceived sweetness. It also has a thinner viscosity than honey, which makes it marginally easier to drizzle evenly across a large surface of yogurt — a small but real convenience when you’re working quickly to prevent the yogurt from melting on the counter.
Which Should You Choose?
Both are excellent choices nutritionally — neither has a meaningfully different sugar or calorie count once you account for volume adjustments. The decision really comes down to:
- Flavor preference: Floral and lighter (honey) vs. deep and caramel-forward (maple syrup)
- Dietary pattern: Strict vegans should choose maple syrup, since honey is an animal product
- Texture preference: If you want a slightly softer, more pliable bark, lean honey; if you want clean, hard snaps, maple syrup’s thinner consistency freezes marginally firmer
For this recipe, we recommend starting with 2 tablespoons of raw honey for a classic flavor pairing with berries, but feel free to substitute maple syrup 1:1 if you prefer, adjusting up slightly (an extra half tablespoon) if you find it under-sweet.
Deep Dive: Pairing Nutrient-Dense, Antioxidant-Rich Toppings
The toppings aren’t just decorative — they’re where a huge portion of this dessert’s nutritional and antioxidant value comes from.
Berries: The Antioxidant Powerhouse
Berries are among the most antioxidant-dense foods available, primarily due to their high concentration of anthocyanins (the pigments responsible for their red, blue, and purple hues) and vitamin C. For this recipe, a mixed berry approach maximizes both flavor complexity and nutrient diversity:
- Blueberries: Extremely high in anthocyanins; their firm texture holds up well when frozen and sliced into the bark.
- Raspberries: Higher in fiber than most berries and bring a tart contrast to the sweetness of the honey.
- Strawberries: Slice thinly — their higher water content means large pieces can create icy pockets if left whole.
- Blackberries: Rich in vitamin K and fiber, with a deep flavor that pairs beautifully with pistachio.
Using a mix rather than a single berry type not only diversifies your antioxidant intake but also creates visual appeal, with the deep purples, reds, and blues standing out against the white yogurt base.
Pistachios: Healthy Fat and Crunch
Pistachios bring a unique combination of healthy monounsaturated fats, plant protein, fiber, and micronutrients like vitamin B6 and potassium. Compared to other nuts commonly used in frozen desserts, pistachios have one of the lowest calorie-per-nut counts, and their naturally vibrant green color adds visual contrast against the berries.
Roughly chop pistachios rather than leaving them whole — this ensures even distribution and prevents any single bite from being overwhelmingly nutty or, conversely, nut-free.
Bonus Nutrient-Dense Additions
If you want to build on the base three-ingredient recipe, consider these antioxidant-friendly additions that won’t disrupt the core simplicity:
- A light sprinkle of cacao nibs for polyphenols and a bittersweet crunch
- Chia seeds for omega-3s and fiber
- A dust of cinnamon, which has its own antioxidant properties and complements berries beautifully
Step-by-Step Instructions
Yields: 1 baking sheet (approximately 8–10 servings) Prep time: 10 minutes Freeze time: 3–4 hours (or overnight for best results)
- Line a baking sheet (roughly 9×13 inches) with parchment paper, making sure the paper extends slightly up the sides for easy removal later.
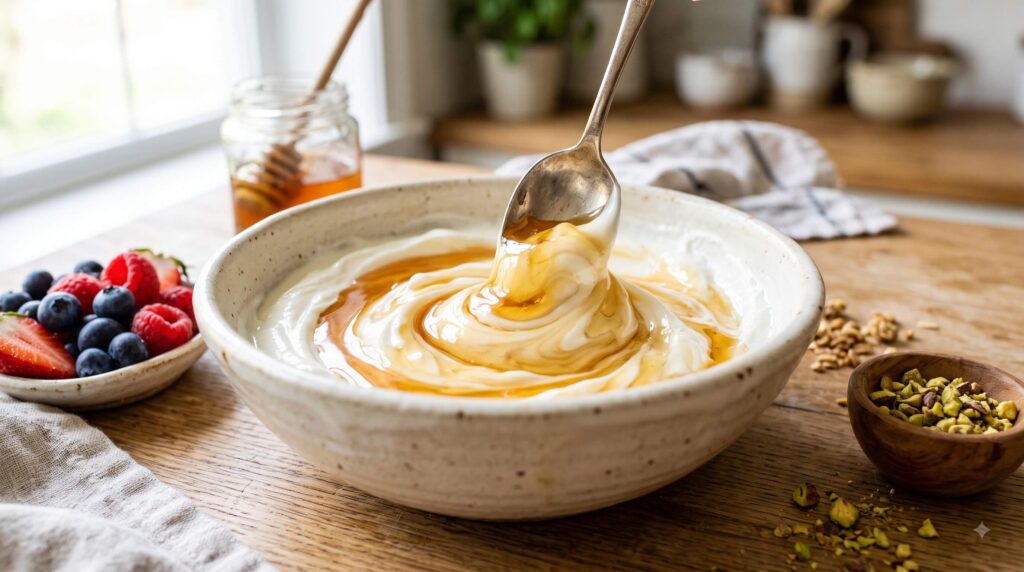
- In a mixing bowl, combine 2 cups of plain full-fat Greek yogurt with 2 tablespoons of raw honey (or pure maple syrup). Stir until fully incorporated and smooth.
- Pour the mixture onto the lined baking sheet and use an offset spatula or the back of a spoon to spread it evenly to about ¼-inch thickness. Even thickness is crucial — thin spots will freeze too hard, while thick spots take longer to set and cut unevenly.
- Evenly distribute your mixed berries across the surface, gently pressing them in slightly so they don’t roll off during freezing.
- Sprinkle roughly chopped pistachios over the top, along with any bonus toppings you’re using.
- Place the baking sheet flat in the freezer for a minimum of 3 hours, though overnight yields the best texture and easiest breaking.
- Once fully frozen, remove from the freezer and let sit for 1–2 minutes at room temperature to make breaking easier.
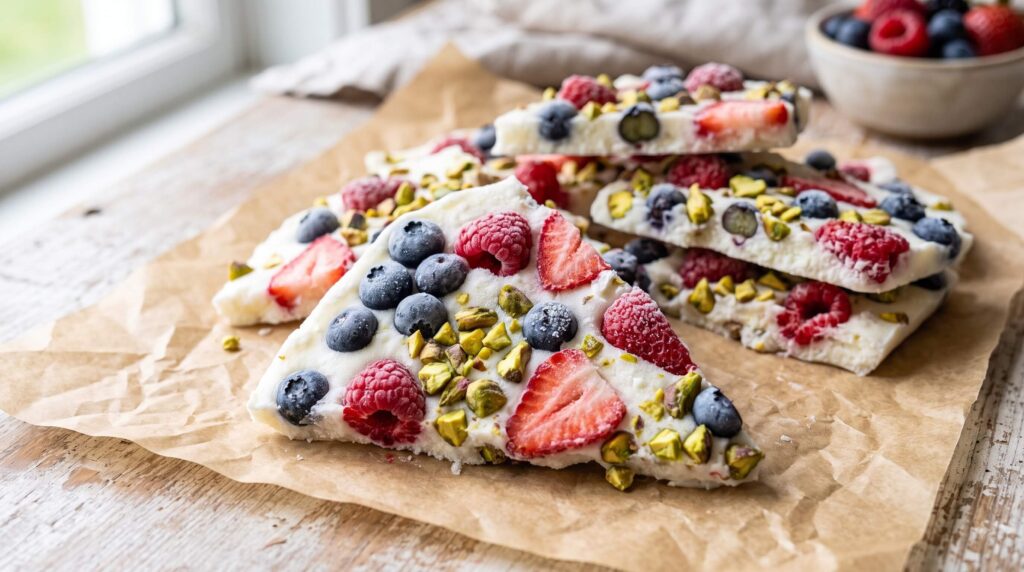
- Break into irregular shards by hand, or use a sharp knife for cleaner pieces.
- Transfer immediately to an airtight storage container (see packaging section below) and return to the freezer, or serve right away.
Packaging Techniques to Prevent Freezer Burn
Freezer burn happens when moisture escapes from the surface of food and re-freezes as ice crystals on the interior of the packaging — a process accelerated by air exposure and temperature fluctuations. Because this bark has a large surface-area-to-volume ratio (it’s thin and broken into pieces), it’s particularly vulnerable if stored improperly. Here’s how to protect it:
- Use an airtight container, not a bag alone: While resealable freezer bags can work, a rigid airtight container better protects the bark from being crushed and minimizes air pockets.
- Layer with parchment paper: Place a piece of parchment paper between layers of bark shards so pieces don’t fuse together and so each layer has a barrier against surface ice formation.
- Press out excess air: If using a freezer bag, press out as much air as possible before sealing — every pocket of trapped air is an opportunity for ice crystals to form on the food’s surface.
- Store at the back of the freezer: The front of the freezer, especially near the door, experiences more temperature fluctuation from opening and closing. Store your bark toward the back for more consistent, colder temperatures.
- Consume within 2–3 weeks: While technically safe well beyond this window, texture and flavor quality noticeably decline after 2–3 weeks, even with excellent packaging.
- Avoid refreezing thawed bark: If a piece has softened significantly at room temperature, its ice crystal structure has already begun to change; refreezing will result in a coarser, icier texture the second time around.
Macros: What You’re Actually Eating
Based on a batch made with 2 cups full-fat plain Greek yogurt, 2 tablespoons raw honey, 1 cup mixed berries, and ¼ cup chopped pistachios, divided into 8 servings, here’s an approximate per-serving breakdown:
- Calories: ~90–100
- Protein: ~7–8g
- Total Fat: ~4–5g
- Carbohydrates: ~8–9g
- Sugar: ~6g (naturally occurring plus a modest amount from honey)
- Fiber: ~1g
Compare this to a typical store-bought frozen yogurt bar or a scoop of regular ice cream, which often runs 15–25 grams of sugar and considerably less protein per serving. The protein-to-sugar ratio here is what makes this dessert genuinely satisfying rather than a fleeting sugar spike followed by a crash.
Keep in mind these numbers will shift depending on your yogurt’s fat content, your sweetener choice and quantity, and how generously you portion your toppings. If you’re tracking macros closely, weighing your yogurt and toppings before assembly will give you the most accurate personalized numbers.
Common Beginner Pitfalls (And How to Avoid Them)
Even with just three ingredients, there are several easy mistakes that can turn a promising batch into a disappointing one:
- Spreading the yogurt too thick. A thick layer takes much longer to freeze solid and often results in a soft, unevenly frozen center. Aim for a consistent ¼-inch layer across the entire sheet.
- Using flavored or sweetened yogurt. This throws off both the sugar content and the texture, since many flavored yogurts contain added thickeners that behave unpredictably when frozen.
- Adding toppings after freezing instead of before. Toppings need to be pressed into the yogurt while it’s still soft; adding them after freezing means they’ll simply fall off when you break the bark into pieces.
- Using whole, uncut strawberries. Their high water content creates large ice pockets and makes for an uneven bite. Always slice larger, water-heavy berries before adding them.
- Skipping the parchment paper. Without it, you’ll fight to pry the frozen bark off the pan, often cracking it unevenly or losing pieces to the baking sheet.
- Breaking the bark too soon. If you break it before it’s fully frozen (3+ hours minimum), you’ll end up with a mushy mess rather than clean shards.
- Storing without airtight protection. As covered above, this is the fastest way to end up with freezer-burned, icy bark within just a few days.
- Not pre-chopping the pistachios. Whole or large pistachio pieces create uneven texture and can make the bark harder to break into manageable pieces.
Final Thoughts
This 3-Ingredient Frozen Greek Yogurt Bark proves that a genuinely healthy dessert doesn’t need a long ingredient list or complicated technique — it needs the right ingredients, prepared with a bit of understanding of what’s actually happening at a chemical level. Choosing full-fat yogurt for better crystallization, picking a natural sweetener that matches your flavor and dietary preferences, layering in antioxidant-dense berries and pistachios, and packaging thoughtfully to prevent freezer burn are all small decisions that add up to a dramatically better final product.
Once you’ve mastered the base technique, this recipe becomes a template rather than a one-off treat. Swap berries for stone fruit in the summer, add a drizzle of nut butter for extra richness, or experiment with different nuts and seeds for topping variety. However you customize it, you’ll have a low-sugar, protein-rich frozen treat ready whenever the craving strikes — no guilt, no fuss, and no complicated ingredient list required.