

If you’ve ever wondered how to make sushi at home without a bamboo mat, a trip to a specialty Asian grocery store, or a small fortune spent on sushi-grade fish, you’re in exactly the right place. This is the guide that finally makes sushi night achievable on a random Tuesday — no fancy equipment, no raw fish anxiety, and no stress.
Over the last two years, TikTok and Instagram have been flooded with viral, no-roll sushi hacks that taste just as good (arguably better) than takeout. We’re talking sushi bakes, crispy rice bites, and muffin-tin sushi cups that come together in under 30 minutes. Whether you’re cooking for a Friday night crowd or meal-prepping lunches for the week, this guide will walk you through everything — from how to make sushi at home with perfectly seasoned rice, to five trending recipes you can start cooking tonight.
Let’s get into it.
The Golden Rule: Mastering Perfect Japanese Sushi Rice
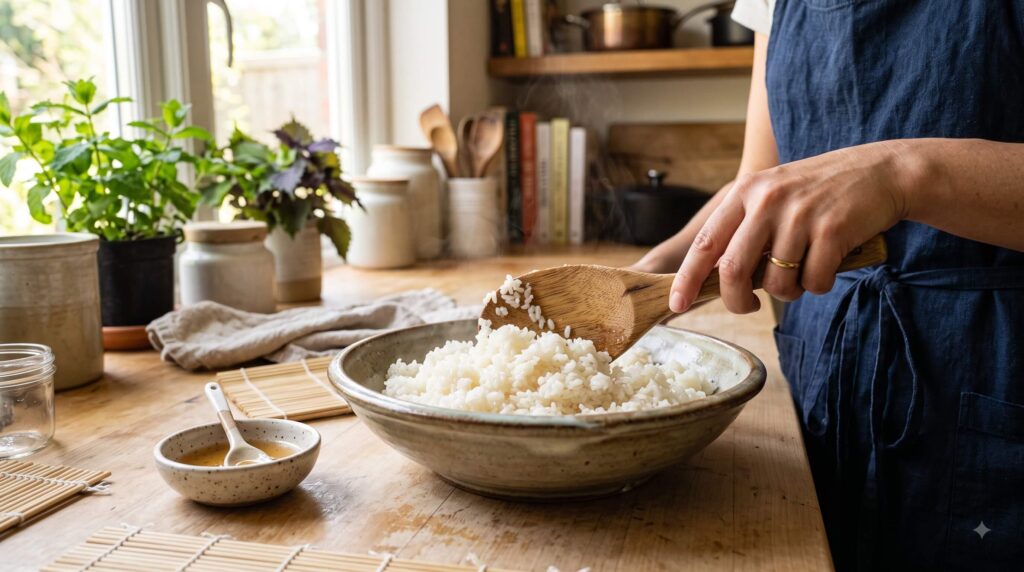
Every single one of these recipes lives or dies by one thing: the rice. Get this right, and you’ve unlocked how to make sushi at home that actually tastes like a restaurant. Get it wrong, and even the fanciest toppings won’t save you.
The Exact Short-Grain Rice-to-Water Ratio
Sushi rice is a short-grain Japanese rice (look for brands like Nishiki, Kokuho Rose, or Lundberg — all widely available at regular US, Canadian, UK, and Australian supermarkets).
| Ingredient | Amount | Notes |
|---|---|---|
| Short-grain sushi rice | 2 cups | Rinse until water runs clear |
| Water | 2 cups | 1:1 ratio after rinsing |
| Kombu (optional) | 1 small piece | Adds subtle umami while cooking |
Key steps:
- Rinse the rice 3–4 times until the water runs mostly clear — this removes excess starch that causes gummy rice.
- Soak for 20–30 minutes before cooking for even hydration.
- Cook in a rice cooker (easiest) or on the stovetop: bring to a boil, cover, reduce to low heat, and simmer for 18 minutes. Let it rest, covered, for 10 minutes off the heat.
The 3-Ingredient Sushi Vinegar Seasoning
While the rice is still hot, mix in your sushi vinegar seasoning:
| Ingredient | Amount |
|---|---|
| Rice vinegar | ¼ cup |
| Granulated sugar | 2 tablespoons |
| Kosher salt | 1 teaspoon |
Warm these three ingredients gently until the sugar and salt dissolve (microwave for 20–30 seconds or heat briefly on the stove — don’t boil). This simple sushi rice vinegar ratio is the exact formula used in Japanese restaurants and is the single biggest flavor upgrade you can make.
Crucial Technique: “Fanning & Slicing” (Never Mashing!)
This is the step most home cooks skip, and it’s the difference between clumpy rice and glossy, restaurant-style grains:
- Spread the hot rice into a wide, shallow bowl or baking sheet (a wooden hangiri is traditional, but a large glass dish works fine).
- Pour the vinegar mixture over the rice in a thin stream.
- Using a rice paddle or wooden spoon, use a cutting and folding motion — slicing through the rice at an angle, never stirring or mashing.
- While folding, have someone fan the rice (or use a handheld fan/paper plate) to cool it quickly. This step gives the rice its signature glossy sheen and separates the grains.
Insider tip: Cool the rice to room temperature before assembling any recipe — warm rice makes toppings slide and nori go soggy.
Essential Grocery Haul (No Specialty Stores Needed)
Part of learning how to make sushi at home the easy way is knowing you don’t need a special trip anywhere. Here’s your one-stop shopping list, all findable at Walmart, Kroger, Trader Joe’s, Sainsbury’s, Tesco, Woolworths, or Coles.
Supermarket Swaps
- Kewpie mayo vs. regular mayo hack: Kewpie (Japanese mayo) is richer and tangier thanks to rice vinegar and MSG — increasingly stocked in regular supermarkets now. No Kewpie? Mix 1 cup regular mayo + 1 teaspoon rice vinegar + ½ teaspoon sugar + a tiny pinch of MSG or dashi powder (optional) for a near-identical result.
Safe Cooked Proteins (No Raw Fish Required!)
- Canned tuna (packed in water or oil, drained)
- Imitation crab (surimi) — the classic California roll protein
- Cooked or air-fried salmon — season and air-fry at 400°F/200°C for 10–12 minutes
- Tempura shrimp — frozen, pre-breaded shrimp works great and crisps up in the oven or air fryer
Pantry Essentials
- Nori (seaweed) sheets
- Furikake seasoning (a sesame-seaweed rice topping — optional but adds huge flavor)
- Sriracha
- Toasted sesame oil
- Soy sauce, pickled ginger, and wasabi paste for serving
5 Trending At-Home Sushi Recipes (Step-by-Step)
Now for the fun part. These are five of the internet’s most-loved, no-roll sushi recipes — each one designed to deliver easy homemade sushi rolls flavor without any actual rolling.
Recipe #1: The Viral Cheesy Spicy Salmon & Crab Sushi Bake
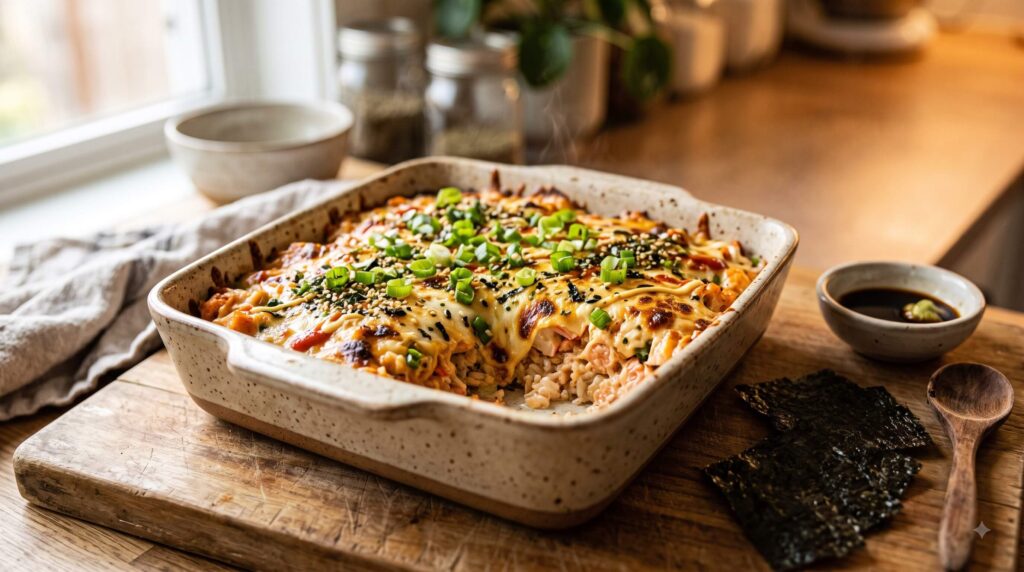
This viral sushi bake recipe is the one that broke the internet — a warm, creamy, cheesy casserole you scoop onto nori sheets like a dip.
Ingredients:
- 3 cups cooked, seasoned sushi rice
- 1 cup cooked salmon, flaked (or canned salmon)
- 1 cup imitation crab, shredded
- ½ cup Kewpie mayo
- 2 tablespoons sriracha
- 1 cup shredded mozzarella or Japanese-style mayo blend
- Furikake, green onions, and nori sheets for serving
Instructions:
- Preheat oven to 400°F (200°C).
- Spread the seasoned sushi rice evenly across a greased 9×9-inch baking dish. Sprinkle with furikake.
- In a bowl, mix the salmon, crab, mayo, and sriracha until fully combined.
- Spread the mixture evenly over the rice layer, then top with shredded cheese.
- Bake for 15–18 minutes, until bubbly and lightly golden on top.
- Broil for the final 2 minutes for a golden crust (watch closely!).
- Garnish with green onions, extra furikake, and a drizzle of sriracha mayo. Serve with nori sheets to scoop.
Chef’s tip: Let it rest for 5 minutes before serving — it firms up slightly and is much easier to scoop cleanly.
Recipe #2: Nobu-Style Crispy Rice with Spicy Tuna/Salmon

This restaurant-favorite delivers crispy rice spicy salmon bites with a golden, pan-seared crust and creamy, spicy topping.
Ingredients:
- 2 cups cooked sushi rice, pressed firm
- Neutral oil for frying
- 1 cup cooked salmon or canned tuna, finely chopped
- 2 tablespoons Kewpie mayo
- 1 tablespoon sriracha
- Sliced jalapeño, for topping
Instructions:
- Press cooled sushi rice into a rectangular dish lined with plastic wrap, about ¾-inch thick. Chill for 30 minutes to firm up.
- Cut into 1.5-inch cubes or rectangles.
- Heat oil in a nonstick pan over medium-high heat. Pan-sear the rice cubes for 2–3 minutes per side, until deeply golden and crisp.
- Mix the salmon/tuna with mayo and sriracha to create the spicy topping.
- Spoon the topping onto each crispy rice piece and finish with a jalapeño slice.
Insider tip: Don’t move the rice cubes too early in the pan — let them form a proper crust or they’ll stick and fall apart.
Recipe #3: 15-Minute Muffin-Tin Baked Salmon Sushi Cups

These baked salmon sushi cups are the easiest recipe on this list — perfect for parties or quick lunches, and they’re basically foolproof.
Ingredients:
- 6 nori sheets, cut into quarters
- 2 cups seasoned sushi rice
- 1 cup cooked, flaked salmon
- 2 tablespoons Kewpie mayo
- 1 teaspoon sriracha
- Sesame seeds, to garnish
Instructions:
- Preheat oven to 375°F (190°C).
- Press a nori square into each cup of a greased muffin tin, letting the edges stick up slightly.
- Press a thin layer of sushi rice into the bottom and up the sides of each nori-lined cup.
- Mix the salmon, mayo, and sriracha, then spoon into each rice cup.
- Bake for 10–12 minutes until warmed through and the edges of the nori are slightly crisp.
- Top with sesame seeds and a drizzle of extra spicy mayo before serving.
Recipe #4: No-Mat California Hand Rolls (Temaki-Style)
Craving easy homemade sushi rolls but don’t own a mat? Hand rolls (temaki) are the answer — they’re rolled by hand into a cone shape, no equipment needed.
Ingredients:
- 4 nori sheets, cut in half
- 2 cups seasoned sushi rice
- Imitation crab, sliced avocado, cucumber matchsticks
- Kewpie mayo for drizzling
Instructions:
- Hold half a nori sheet, shiny side down, in your palm.
- Spread a thin layer of rice over the left two-thirds of the sheet.
- Layer crab, avocado, and cucumber diagonally across the rice.
- Roll from the bottom left corner up and over, forming a cone shape, and dab a few grains of rice on the edge to seal.
- Drizzle with Kewpie mayo and eat immediately for maximum nori crunch.
Recipe #5: Deconstructed Spicy Tuna Sushi Bowl
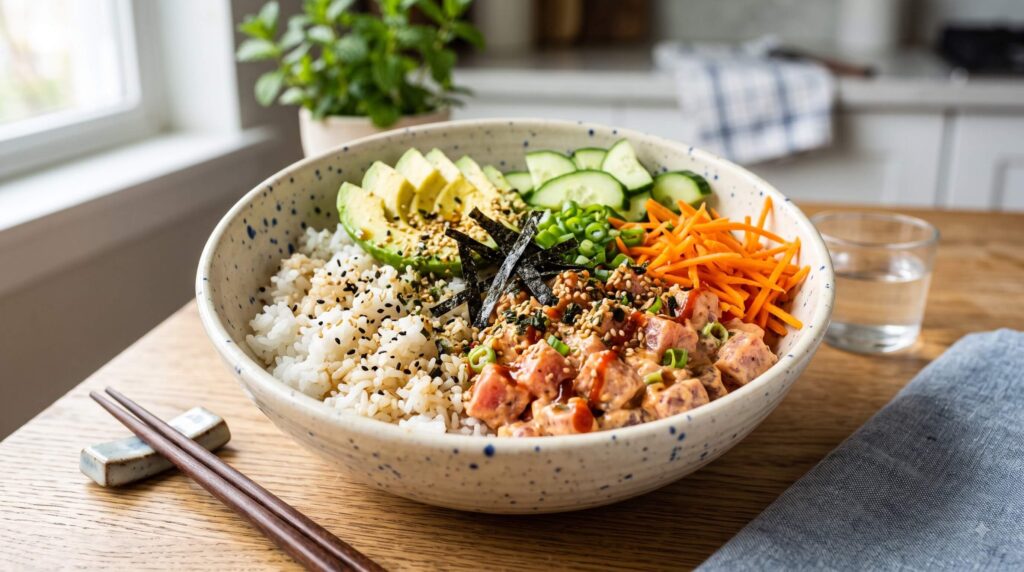
The ultimate 10-minute weeknight dinner or meal-prep hero — all the flavor of sushi, none of the assembly.
Ingredients:
- 2 cups seasoned sushi rice
- 1 can tuna, drained and mixed with 2 tablespoons Kewpie mayo + 1 tablespoon sriracha
- Sliced cucumber, avocado, shredded carrot
- Furikake, nori strips, sesame seeds
- Soy sauce and sesame oil to drizzle
Instructions:
- Divide the sushi rice between bowls.
- Top with spicy tuna, cucumber, avocado, and carrot.
- Sprinkle generously with furikake and nori strips.
- Drizzle with soy sauce and sesame oil just before serving.
Meal-prep tip: Store components separately (rice, tuna mix, veggies) and assemble just before eating to keep everything fresh and crisp.
Chef Secrets for Crispy Nori & Leak-Proof Sushi
A few small techniques separate amateur sushi from the real deal:
- Toast your nori over a light flame for 3 seconds per side. Hold the sheet with tongs and quickly pass it over a gas burner (or a hot dry pan) — this brings out a deeper, nuttier flavor and crisps up any sogginess from storage.
- No bamboo mat? Use the parchment paper hack. Lay a sheet of parchment paper on your counter in place of a bamboo mat — it provides enough structure to roll and shape hand rolls or rice cups without sticking.
- The wet knife technique: Dip your knife in water (or wipe with a damp cloth) between every single cut. This prevents rice from sticking to the blade and gives you clean, restaurant-style slices instead of squished edges.
Storage, Reheating & Meal Prep Guidelines
Learning how to make sushi at home also means knowing how to store it properly so nothing goes to waste.
- Storing leftover sushi rice: Place in an airtight container at room temperature for up to 4 hours, or refrigerate for up to 2 days. Rice hardens in the fridge due to starch retrogradation — to revive it, sprinkle with a few drops of water and microwave in 15-second bursts, fluffing between each.
- Reheating a sushi bake: Cover with foil and reheat in a 350°F (175°C) oven for 10–12 minutes until warmed through. Avoid microwaving if possible — it can make the topping watery.
- Can you freeze a sushi bake? Yes — freeze the rice and topping layers before baking, tightly wrapped, for up to 1 month. Thaw overnight in the fridge, then bake fresh with cheese added just before it goes in the oven for the best texture.
Frequently Asked Questions
Is it safe to make raw fish sushi at home? It can be, but only if you buy fish specifically labeled “sushi-grade” or “sashimi-grade” from a reputable fishmonger, and use it the same day. For most home cooks, sticking to cooked proteins (salmon, tuna, shrimp) or canned/imitation options — as used in all five recipes above — is the safer, simpler, and still delicious route.
What can I substitute for Kewpie Japanese mayonnaise? Mix 1 cup regular mayonnaise with 1 teaspoon rice vinegar and ½ teaspoon sugar. For an even closer match, add a small pinch of MSG or dashi powder if you have it on hand.
Why is my sushi rice falling apart? This usually means one of two things: the rice wasn’t rinsed enough before cooking (too much starch washed away means less stickiness), or it wasn’t seasoned and folded properly while still warm. Follow the sushi rice vinegar ratio above and use the fanning-and-slicing technique for the best texture.
What is the best rice to buy in US supermarkets for sushi? Look for short-grain Japanese rice brands like Nishiki, Kokuho Rose, or Botan — all commonly stocked in the international or rice aisle of most major grocery stores across the US, Canada, UK, and Australia.
Now that you know how to make sushi at home with zero special equipment and totally accessible ingredients, it’s time to pick your favorite recipe and get cooking. Whether it’s a cheesy sushi bake for game night or a quick sushi bowl for meal prep, restaurant-quality sushi has never been this easy.
📌 PIN THIS RECIPE! Loved this guide? Save it to Pinterest so you can come back to it anytime sushi cravings hit. 👉 [Pin It Here]